Craftsman House Numbers

Our 1931 bungalow is built in the craftsman style. While we certainly don’t embrace everything about this architecture style indoors, we do as much as we can to retain its character outside.

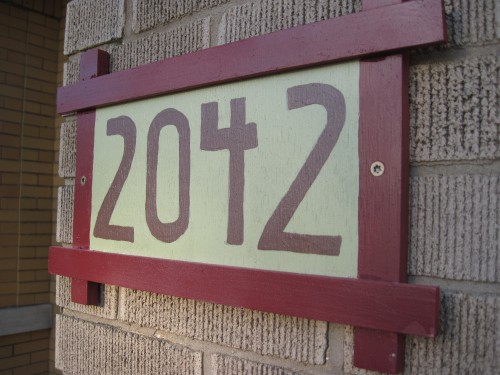
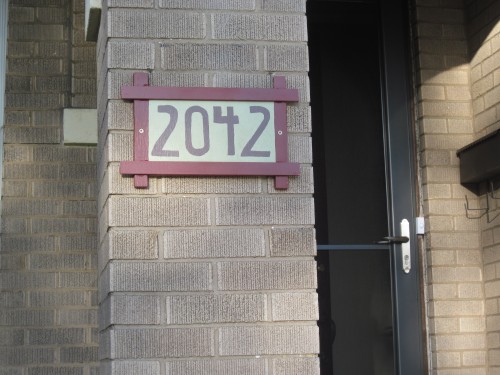
So, when we decided to upgrade our old house numbers, we thought a little DIY project would be a fun and easy way to do it. It was really simple, actually, and we ended up with this:

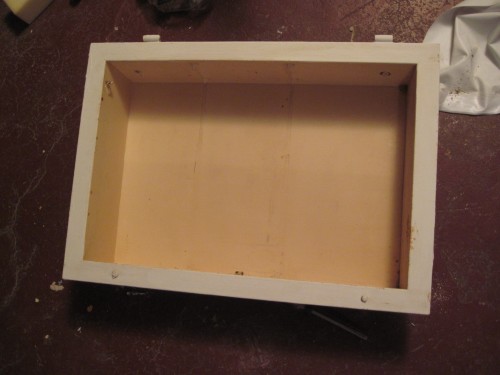
It was really simple, actually. I just made a frame out of some leftover plywood and trimmed it out with some one-inch plywood strips on the sides. We painted everything in some complementary colors and coated it all with polyurethane afterwards to keep it weather-safe.

For the numbers, I simply found a font in the craftsman style, printed out our house numbers, and freehand drew them on then painted it in a contrasting color. We only had to pick up the trim and a couple of the paint colors. The rest of the supplies we had on hand.

7 Comments

Filed under Uncategorized

Hacking a Potted Plant

While searching for something totally unrelated at one of our favorite haunts (hardware store) the other day, we picked up these two houseplants.

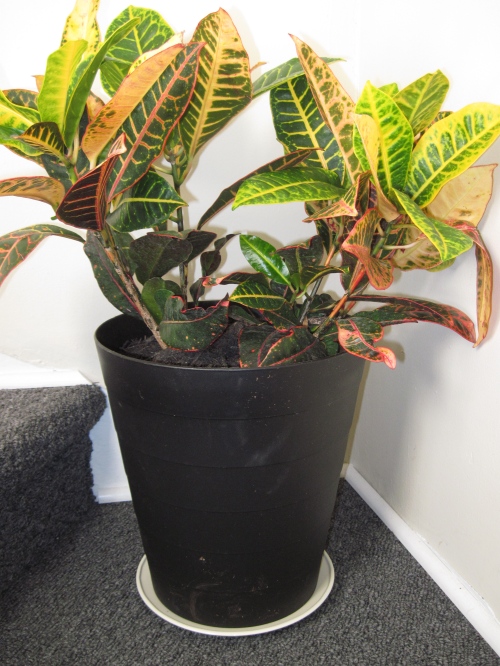
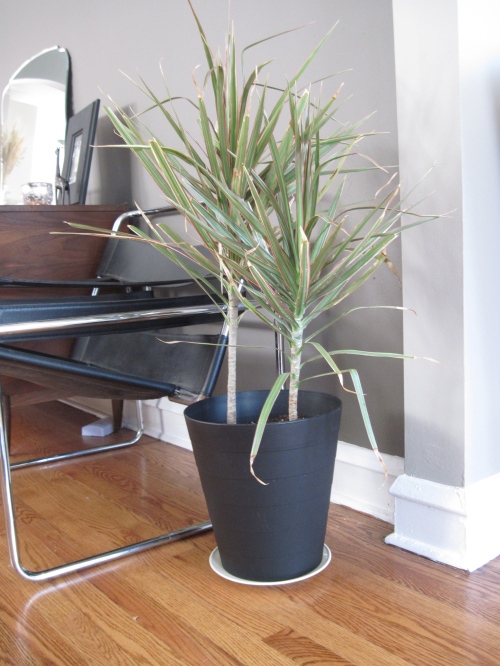
They’re a Dracaena and a Croton (crouton? mmm), and they’re a little worse for the wear, which is why they were marked down to 3 and 4 dollars. That’s also why they made it into our shopping cart. They still had a lot of life left in them, and after leaving them outdoors in the direct sunlight and giving them plenty of water for a couple of weeks, they were as good as new.

Problem is, they’re pretty big plants, and we definitely wanted to move them indoors, but we had no pots large enough to replant them in. We looked around a bit for something simple, modern and attractive, but we came up short. Everything was either very pricey, or cheap, flimsy and really ugly. So, for a while, they stayed in their little cheap plastic tubs until we finally came up with a solution.

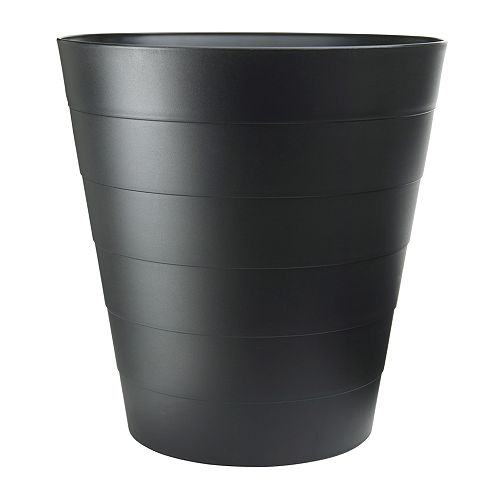
We have one of those ubiquitous IKEA wastebaskets in our office. You know the one – this one:

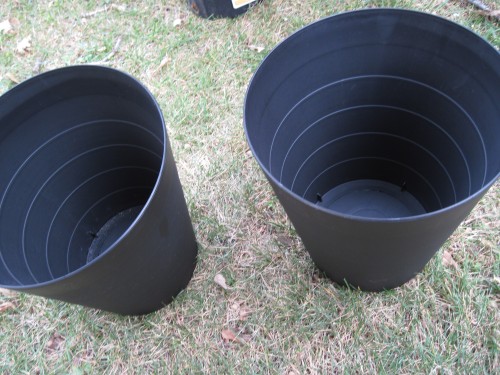
At only $1.99 and a little over 11 inches in diameter, it was perfect for our purposes. The plastic walls are actually pretty substantial, too. It was only a little deep, but that was something we could easily fix.

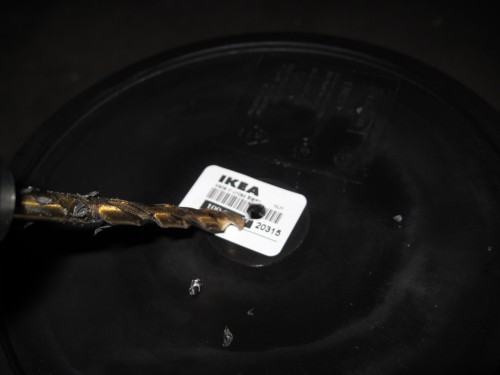
We picked up two wastebaskets and started by drilling a drainage hole in the bottom.

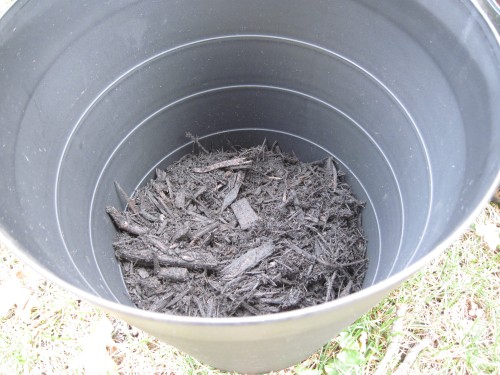
Next, we added some mulch leftover from our landscaping into the bottom of each pot. This would help with drainage and take up some of that space in the bottom of the pot.

Finally, we just transferred in the plants, added some potting soil, and set each pot atop a plate to catch any draining water.

A very cheap and easy solution.

Leave a comment

Filed under Uncategorized

Galvanized Shower Surround: A Complete How-To

As we promised, here’s our complete run-down on how we installed our galvanized shower surround.

If you’ve followed us at all recently, you know we just upgraded our basement bathroom and took it from a dark and dated space to a clean, much-more-our-style type of place.

IMG_1337

Included in that complete redo was a new shower surround. Inspired by a few pictures we’d seen in magazines and across the web, we decided to go with a galvanized corrugated metal shower surround.

IMG_1340

IMG_1321

We knew we loved the look of this (industrial, modern, simple), but when we started searching for how to actually implement our new idea, we came up decidedly short.

As we first do with any new project, we pulled out our go-to DIY sources and hit up our favorite websites for help. While we found a few discussions online on using galvanized metal for a shower surround, nowhere did we find very clear steps on how to implement it in our home. So, with a lot of trial and error, we muddled through it and came up with a system that worked for us. We’re pretty happy with the results, and we thought we’d share our process with you in hopes of helping out others out there with the same idea. Here’s the steps we took to make our galvanized shower surround. Keep in mind, this is what worked for us and might not work out for your space. Tweak as needed, but hopefully this will serve as a good launching pad for your project.

Things You’ll Need:

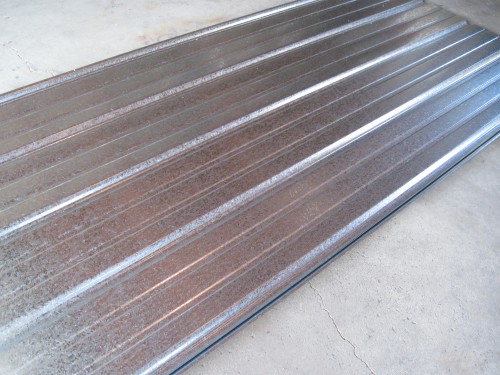
  • Sheets of Corrugated Metal – We ordered ours from a local chain hardware store. Other stores didn’t carry it. You may have to shop around a bit to find this, but odds are you can find it somewhere close by. Ours came in 3 foot widths at 8 feet long. Be sure to measure your space well and add about 5-10%.

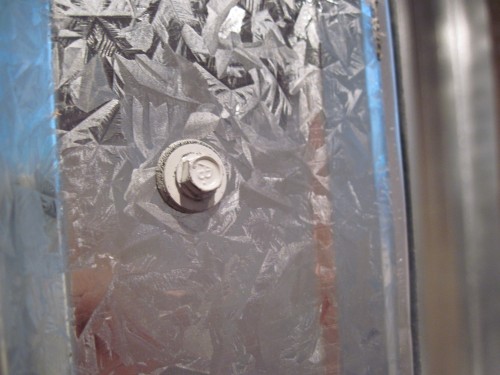
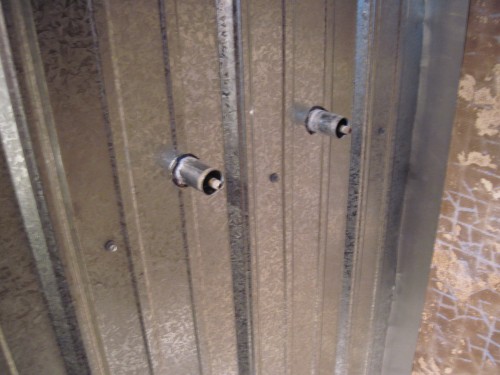
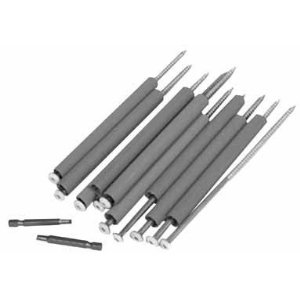
  • Polebarn Screws – These will be used to attach the panels to the wall. They have a self-sealing rim around the head of the screw that, once pressure is applied, keeps the hole watertight. We applied screws in a grid pattern of 1 foot apart horizontally and 2 feet apart vertically, so use this formula with your measurements to come up with the number of screws you’ll need. Odds are they’ll come in a box for about $5, which will be more than enough for your purposes.

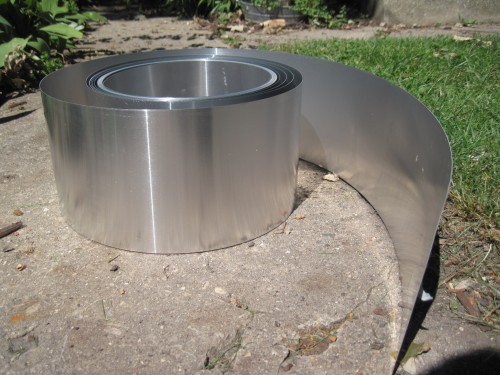
  • Aluminum Flashing – Figure out how much you’ll need by determining how many corners your sheets of metal will turn (in our case, four) and how tall your metal shower surround will be.

  • Caulk – We used a tube of white kitchen/bath caulk, clear silicone caulk, and aluminum flashing caulk in an aluminum color. We also used a tube of construction adhesive (Liquid Nails).
  • Trim – This part is a matter of taste but also necessity. Corrugated metal won’t sit flush against your walls, and the tops (and maybe bottoms) will probably need to be trimmed out to keep water from getting behind it. We used cedar as our trim.

  • Finishing Nails – We used these for our cedar trim.
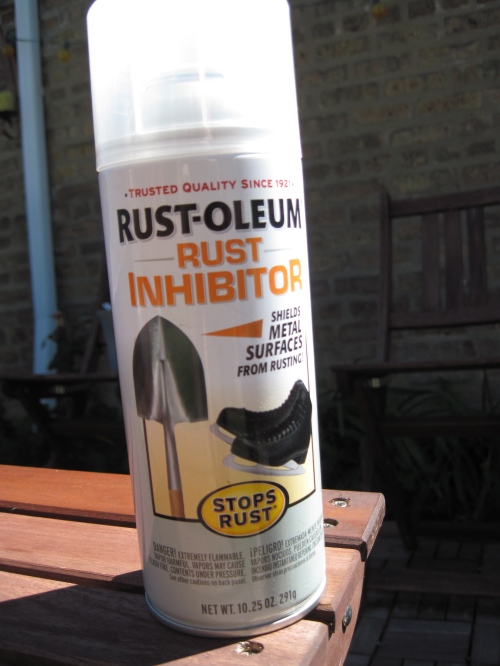
  • Rust Inhibitor/Sealer – We used Rust-O-Leum Rust Inhibitor, which prevents metal from rusting without paint. You could also use a form of polyurethane or some other type of spray-on clear coat.

Tools You’ll Need:

  • Circular Saw
  • Drill
  • Hole Boring Drill Bit
  • Hammer

Steps:

  • Measure – The first thing you should do is measure the area surrounding your shower or bath to determine how many panels of galvanized roofing material you will need. Like I mentioned, the panels we purchased were about 3 feet wide by 8 feet long. Make sure you know the size of your panels and use those measurements to determine how many to purchase.
  • Purchase Galvanized Roofing Panels – Again, I ordered my panels from a local hardware store. It was really inexpensive, which makes this project even more desirable. Shop around. Look for metal fabricators or roofing supply stores if you’re stumped.
  • Cut the Panels to Fit – This is the tricky part. First, make sure you’ve measured well the space for the panels to fit. If your walls are pretty square, this could be an easier step. If they’re not (like ours!), then you want to measure and measure again! Transfer those measurements to the panels and create a pattern around which to cut.

    There’s a few ways you can cut these. At first, we tried a sheet metal blade on a jigsaw, but that didn’t work at all! It broke before cutting even an inch. We also tried tin snips, but that ended up working best for only the small cuts. Eventually we landed on using a circular saw with a plywood blade turned backwards. There’s something about putting the blade in the wrong way that made the easiest and cleanest cuts for us. A real word of caution here, though: Be sure to wear eye protection! It also wouldn’t hurt to wear long sleeves, long pants, and gloves. Cutting the metal this way creates a lot of sparks, and I ended up getting quite a few minor burns from it. Also, trim the bottoms to fit around your shower basin or bathtub. This is where the tin snips might come in handy!

  • Seal Galvanized Panels – Like I said above, we used Rustoleum’s Rust Inhibitor to prevent our panels from rusting. While these panels are designed to stand up to weathering, they will eventually rust. We’re hoping this keeps that at bay for a long time (if not indefinitely). We simply sprayed this on, wiped off the excess, and waited for it to dry. We plan to reapply once every year or so.

  • Cut Out Around the Knobs – If you have knobs in the wall of your shower, you’ll need to trim the roofing panels to accommodate them. Remove the handles and place the panel against the wall. Determine where the handles will go by leaning the panel against the pipes and trace around them. I used a hole boring drill bit in a 1.5” size to cut out for the knobs. This was also a bit tricky. I placed the panel on a 2×4 and clamped it in place while I pressed hard against the panel with the drill bit and made the holes.

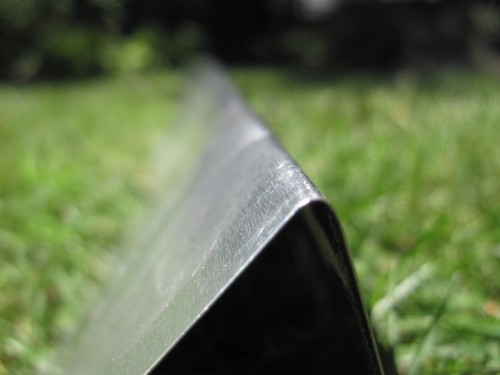
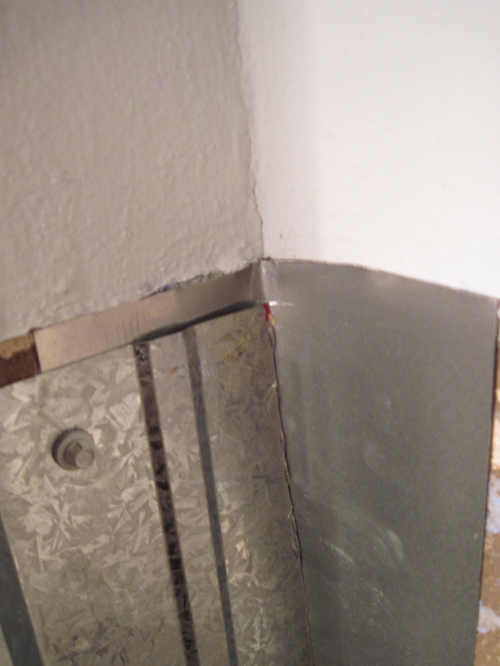
  • Cut Flashing for the Corners – To ensure that water doesn’t get behind the wall panels and mold the wall, you’ll want to put flashing in all the corners. This can be bought in a roll at any hardware store. Simply cut the flashing down to the appropriate size for your corners and, using a straight edge (such as the edge of a tabletop), bend the flashing into a 90 degree angle.

  • Apply Flashing to the Walls – Using a little silicone caulk, adhere the flashing to walls in the corners. You may want to do this as you approach corners when applying the panels. The silicone might not be enough to permanently and instantly adhere the flashing to the walls, and if you apply the panels with screws over the flashing, it’ll be much easier to adhere it to the wall.

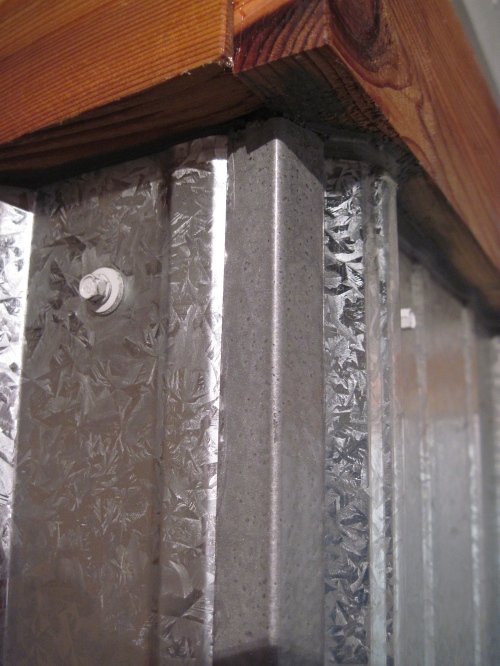
  • Apply Galvanized Panels to the Walls – Once the flashing is installed, you’re ready to apply the galvanized panels to the walls. For this, I used Polebarn screws, which are special screws with a self-sealing rim around the head. When firmly attached to the panels, a rubberized ring creates a watertight seal. We applied these every 1 foot horizontally and every 2 feet vertically.

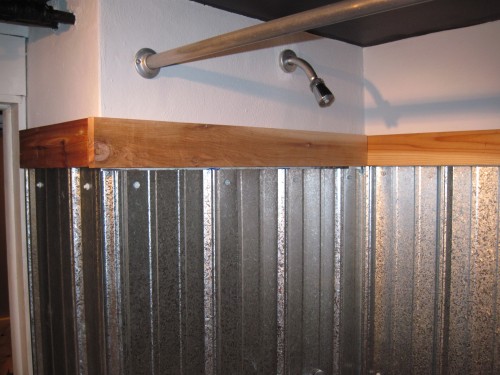
  • Trim the Tops of the Panels – For our surround, we used 1×4 cedar planks to trim out the top. Corrugated metal panels won’t sit completely flush against the wall, and to keep water from leaking behind them, we felt it was important to have a way of capping them off. We used cedar because of its imperviousness to rot, and we sealed it with a deck stain. You may want to use polyurethane or some sort of marine seal if you choose to go this route. We simply cut the cedar boards to fit, applied liquid nails to the backs, and attached them to the wall with decking screws and trim nails. I used decking screws to attach the rear trim piece to the wall and covered over the screw heads with the adjoining trim pieces. Then, we used trim nails to attach each portion of the cedar trim to the other.

  • Caulk! – Finally, you’ll want to caulk all the seams and corners. We ran large seams of clear silicone caulk in all of the inside corners and where panels overlapped. We also used aluminum caulk on the tops of the panels where they each met the cedar board above. Finally, I used Shower caulk in glossy white to fill the space between the bottom of the galvanized panels and the shower surround.

Depending on the size and shape of your shower and if you decide to continue the galvanized panels outside of the shower area, like we did, you may end up with some pretty sharp corners. On the outside of our shower, we had two panels meeting, which created a bit of a dangerous situation. To solve this, we used plastic corner guards, picked up at that hardware store. We used a plastic hammered silver spray paint to coat them, giving them the look of galvanized metal. Then, we used some of our caulk to adhere them to the corners to cover the sharp edge.

It’s also worth noting that others (like these guys) have used Z-channel as a water barrier around the bottom of the galvanized panels. This is probably a very efficient way of prevent water behind your panels. Like I said, this is just what worked for us – experiment a bit and come up with a solution that fits your needs.

That should do it! Hopefully this will get you well on your way to creating your own galvanized shower surround. Do us a favor, though. If you try this, please let us know and give us any tips on things you did differently or things that worked better for you. Good luck with it!

25 Comments

Filed under Uncategorized

Bathroom Updates: The Big Reveal!

We’re finally finished with our basement bathroom renovation (read all about it here, here, here and here), and we’re eager to show you all our hard work. But, first, let’s take a look at how far the bathroom’s come. Here it is before we started any work on it:

IMG_0886

It had that same mosaic grungy tile we tore out of our kitchen:

IMG_0888

And the sink had seen better days.

IMG_0890

So, we got hard to work by installing a new sink scavenged from Jarrett’s parents, laying a new floor, switching up the medicine cabinet, and creating a shower surround out of galvanized roofing material (which we’ll give you a complete how-to for in a separate post). Here’s the grand reveal:

IMG_1337

IMG_1340

IMG_1321

IMG_1310

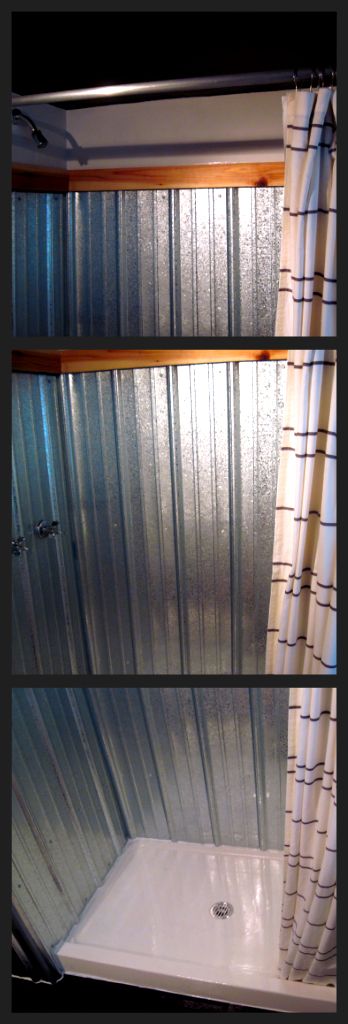
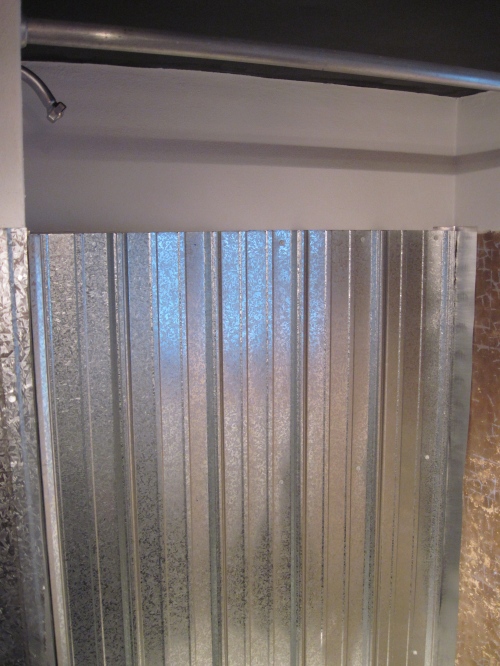
It’s a really small space, as you can see, and getting some good pictures was especially hard. I actually had to piece together a few pictures to give you a full shot of the shower. Here’s one corner of the shower with the full galvanized shower surround and cedar trim:

We used 1×4 pieces of cedar that we treated with Thompson’s Water Seal to trim out our new shower surround. We picked cedar, of course, because it’s rot-resistant. Hopefully the Water Seal will keep it from graying as well.

We were also able to keep the existing shower head and faucet knobs to keep things as economical as possible. The shower curtain that we had hung in the bathroom originally also fit nicely into the new space.

Down below, we simply coated the shower basin with a fresh coat of epoxy designed as a tub and tile refinisher. You might recall that we actually used the same stuff to turn our avocado green tilework in the upstairs bathroom to white. We had plenty left over from that job, so we used the same can to liven up this shower basin. It takes a few days to cure but is really easy work. It’s completely self-leveling, so any errant brushstrokes were totally hidden by the time it all dried.

IMG_1338

IMG_1305

IMG_1349

IMG_1348

We extended the cedar trim and galvanized roofing panels outside the shower for the small spaces adjacent to it to keep some consistency on that side of the room.

IMG_1346

IMG_1345

We also used cedar in the cutout section beside the medicine cabinet as well as along the ledge under the window to create extra shelving space.

IMG_1309

IMG_1308

We also painted the ceiling black and replaced the bare overhead lightbulb with this great directional light. It creates a really nice effect in the bathroom (but makes for some pretty harsh shadows in photos – sorry about that!).

IMG_1329

And did we mention we did all of this on an extremely tight budget? Here’s the breakdown:

  • paint (Behr and RustOleum): $35
  • cedar trim: $12
  • Water Seal: $7
  • Galvanized Panels: $35
  • Screws: $10
  • Caulk: $16
  • Sink: FREE
  • Light Fixture (IKEA): $10
  • Mirrors (IKEA and Lowe’s): $15
  • Trash Can (IKEA flower pot): $4
  • Flooring (Armstrong Peel & Stick Tiles) $12
  • Shower Curtain (CB2): Already Owned, so FREE
  • Toilet Paper Holder (IKEA): Already Owned, so also FREE
  • Whale Hook (Urban Outfitters): $2

TOTAL: $158!

Not bad, right? Granted, we ended up buying this IKEA sink for $75, which turned out to be a disaster, and we never used it. But, maybe we can pick up a few bucks on that by unloading it on Craigslist? Either way, we’re pretty satisfied!

IMG_1307

13 Comments

Filed under Uncategorized

Compost Keeper

We’ve been composting for a while now, and we’re excited to finally use all that rich compost next spring when we begin gardening again. For a long time, we’ve kept all our food scraps and compostables in an old coffee can under the sink before taking them outside to our larger compost bin in the backyard. It wasn’t even one of those nice tin ones; it was a foiled carboard can. Needless to say, after several months, it had seen better days and smelled…well, not so great!

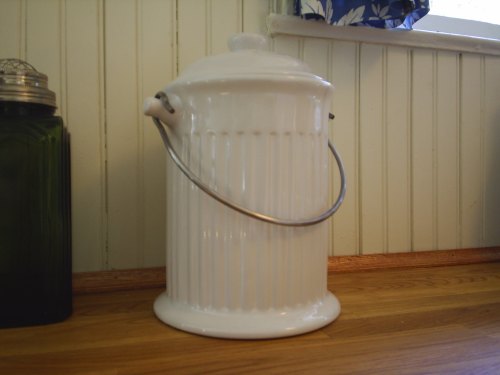
Finally, we decided to upgrade to this ceramic model.

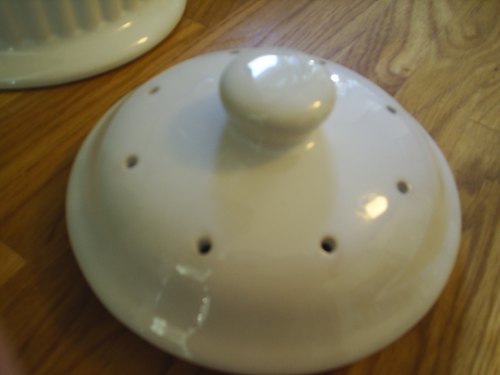
While nothing super special, it’s a definite upgrade for us. It looks nice enough that we can keep it on the counter (since that’s where it usually ends up staying anyway). The lid allows air to get inside, which is necessary for a healthy compost.

AND, most importantly, it has a nice, replaceable charcoal filter inside to keep the smells under control.

A much, much better solution!

1 Comment

Filed under Uncategorized

Bathroom Updates: Nearly There

We’re coming very close to being done with all the bathroom updates we’re making to our basement bathroom. From installing a new (to us) sink to laying a new floor, we’ve done quite a bit to spruce up the dated and frankly creepy bathroom.

We’ve put most of the finishing touches on the bathroom, and we’re almost ready to show the final product. As we referenced in this post on keeping our basement dry, we used Behr’s Waterproofing paint to give the masonry walls a fresh coat of paint. We’ve also done some trimwork, installing shelves and updating an old medicine cabinet. Here’s a bit of the room in progress:

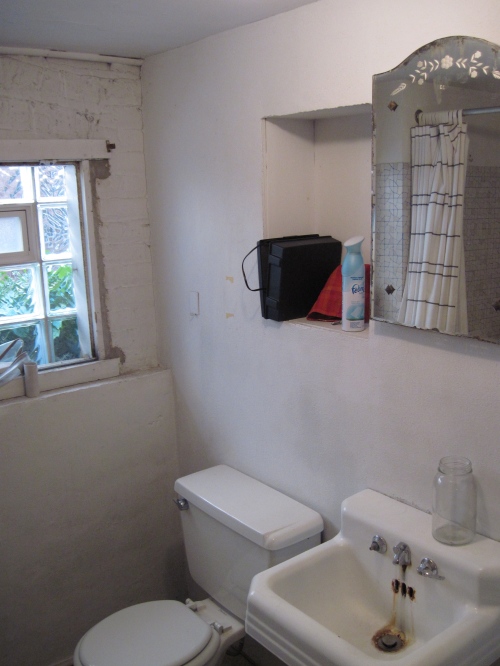
That’s a shot from before we started any of the bathroom updates. You can see the medicine cabinet above the sink there. It’s actually a pretty cool cabinet. It’s from 1923, has an etched pattern in the top, and is seriously heavy duty. We decided to keep it in the room, but change the mirror out and clean it up a bit to fit the room’s aesthetic. Don’t worry – we kept the great mirror and plan on incorporating it somewhere else.

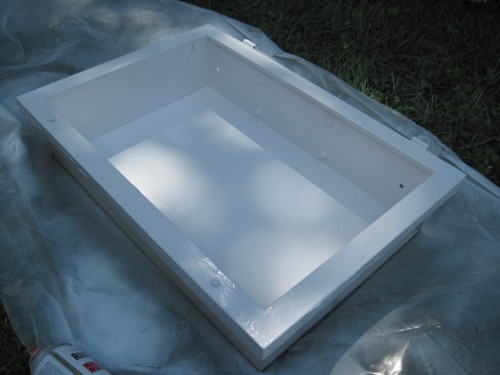
First, we removed the door, and took out the old rusty (but still in good shape) cabinet. We simply gave it a new coat of glossy white spray paint and primer…

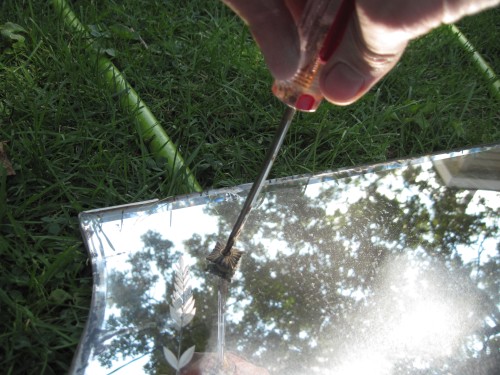
Then, the mirror easily came off of the door by removing the four screws holding it in place.

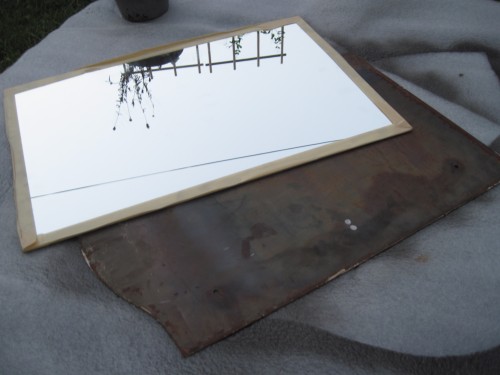
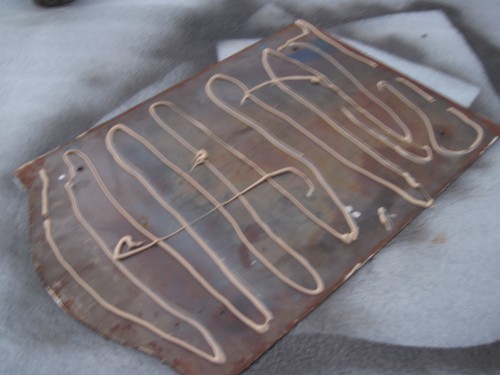
We had a mirror cut to size at Lowe’s (did you know they’ll do that?) for under ten bucks. We also picked up a product called Mirror Mastic that’s like a glue to hold the mirror in place.

Once all of that was put back together, we just popped the medicine cabinet back in, screwed it in place, and we were done! Now we have a much more clean and streamlined medicine cabinet to go with our new bathroom:

Oh, and in the mirror, you can catch a glimpse of the galvanized corrugated metal we’re putting in place as a shower surround. Here’s a bit of the work-in-progress. Stick around for a full reveal as well as a how-to (because we went through a lot of trial and error on that!).

3 Comments

Filed under Uncategorized

A New and Improved Backyard

For the past few days, I’ve been painting and repairing our exterior windows. While the weather has been much cooler around here, I thought I’d take advantage of some time off to get some much-needed home repair done.

I painted the windows overlooking our backyard, and it occurred to me not only how much different the windows themselves look, but our entire backyard has undergone a complete change from when we first moved in a little over a year ago.

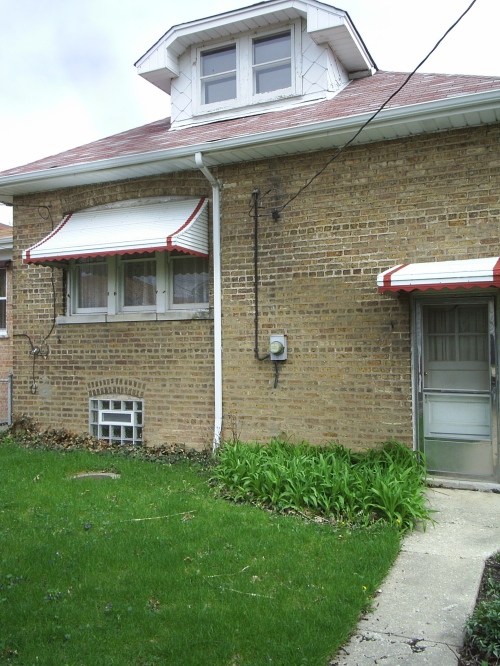
This picture was taken before we even moved in. In fact, we took this picture for our home insurer for their records.

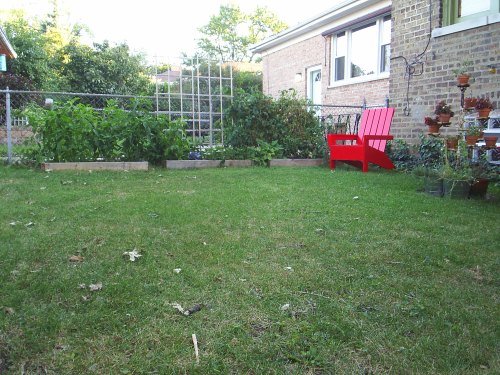
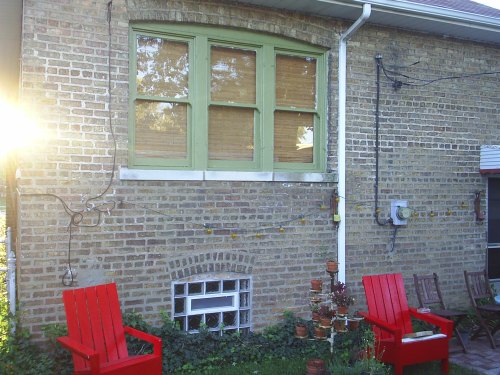
We’ve since removed the awning over those three windows in the rear, and just yesterday, I painted them all a shade of mossy green, to match the trim in the front of the house. Here’s a few shots of the backyard as it looks today. We’ve done quite a few things to upgrade the space, including gardening, making our own adirondack chairs, and installing a patio.

Leave a comment

Filed under Uncategorized

Keeping Things Above Water

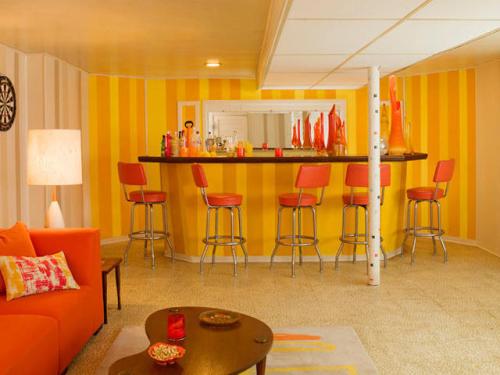
One of the great things about our house is the large basement that would nearly double our living space if it were all in good shape and livable. That’s why we’ve been working to get it up to par so much lately. The real impetus for change was when we won this great basement makeover from Apartment Therapy, which took our basement bar area from this:

to this:

We were thrilled with the updates; the guys from Apartment Therapy took our dreary glum basement a long way toward being a really great hangout spot for us and our friends. We still have a few things to do to really finish it off (like repair much of the ceiling and floor), but it’s nearly there.

After that, we decided to update our outdated and only partially functioning basement bathroom. We haven’t quite finished that project yet, but we’re *this* close!

IMG_0886

Next, we took our basement workroom and cleared all the tools out to set up shop in our detached garage.

The plan is to take the old shop and convert it into a guest bedroom, making a comfortable guest quarters downstairs complete with a private bathroom. While we’re not planning a family just yet, we thought while we have the time, we’d make as many updates as possible to make way for a family we hope to have sometime soon.

With all the changes going on downstairs, we certainly wouldn’t want our hard work ruined by flood waters. Our neighborhood has been known to get a lot of rainwater, and our neighbors a couple of streets over have seen their basements under several inches of flooding. While we’ve not gotten any serious water in our basement (fortunately, our house is at the top of a small hill), we don’t want to chance it and are taking every precaution we can to keep out any dampness. Here’s what we’re doing to make sure our basement stays dry:

1. Keeping all Gutters in Repair. Last summer, we noticed that the gutter on one side of our house was partially detached from the house. Rainwater was spilling over the side of the roof and missing the gutter at that detachment. Water not directed away from the foundation has an awful way of seeping inside. Right away, we took long gutter screws and reattached the gutter to the roof.

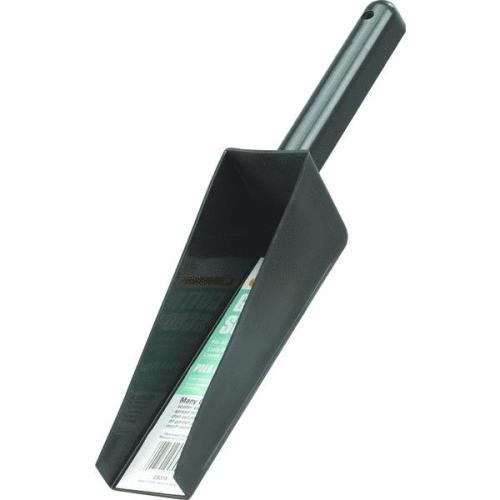
While I was up there, I also used a gutter scoop to clean out all the leaves and gunky material keeping the gutters from draining effectively. We plan to clean them out twice a year.

2. Caulking Sidewalk Seams. Along the same side of the house as we made the gutter repairs, we have a long sidewalk abutting the foundation of the house. Between the sidewalk and the house, I used concrete/masonry caulk to fill the seam. I used a polyurethane-based caulk to allow for the seam to expand and contract in the changing weather.

3. Foam Fill Sidewalk Cracks. Along with caulking the seam along the sidewalk and house, I used a foam insulating material to fill all the cracks we couldn’t afford to repair right away. This foam sealant is completely waterproof and will hopefully keep water that might seep through the cracks and into the basement well at bay. 4. Waterproof Masonry Paint. We used this Behr Masonry and Concrete Waterproof paint to paint the brick and concrete walls in our basement. It’s designed to keep seepage out of concrete walls and has a built-in mold and mildew inhibitor.

5. Sloping Adjacent Land Away From The House. For the landscaping in front of our house, we made sure the soil was tapered to slope away from the house at least one inch for every six linear feet of land. This helps to keep rainfall aimed away from the foundation and out of our basement.

All that prep work should lead to a dry and (soon) welcoming basement.

1 Comment

Filed under Uncategorized

Midcentury Magazine Rack

We’ve made mention of our favorite thrift store in the past. It’s where we’ve picked up a lot of essentials, furniture, and random stuff over the years.

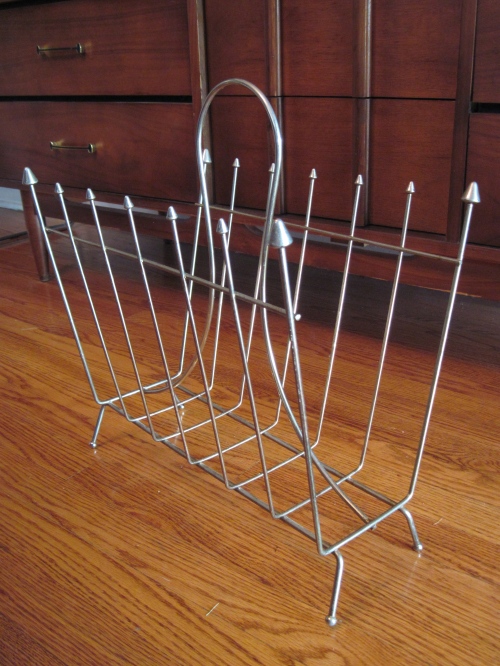
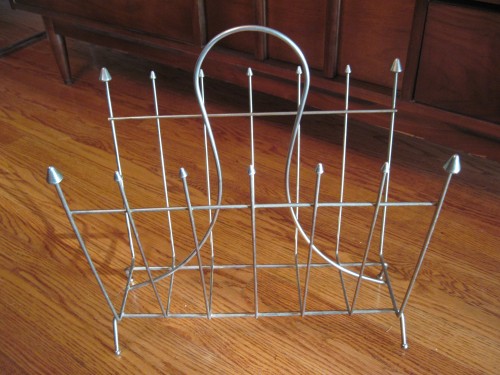
Just the other day, we spied this:

And at only three bucks, we were sold! Told ya this place was our favorite. They have some pretty unbelievable finds for much, much less than you would find at an area antique or specialty shop.

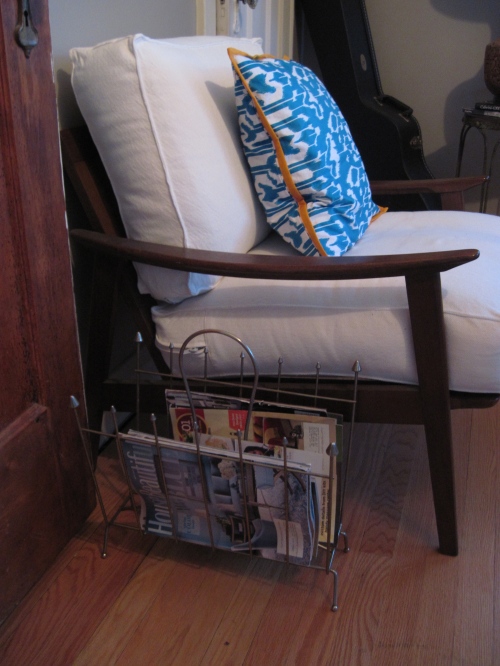
And because we only buy what’s truly functional, we found the perfect spot for it:

4 Comments

Filed under Uncategorized

An Organized Mess

Our garage had become a huge mess. We organized it last fall, but we didn’t do the best job, and everything ended up a big cluttered heap again. As you know, we’re in the process of updating our basement bathroom, and as soon as that project’s done, we’re going to convert the basement shop into a guest bedroom. Also, the big basement bar recently underwent quite a transformation. All that change in the basement means our workspace has to find a new home. Luckily, we have a pretty big (for Chicago) garage that can easily pull triple duty: parking, workshop, and storage. The space is definitely there, we just needed to create a really workable plan to make sure that all our hard work at organizing isn’t in vain.

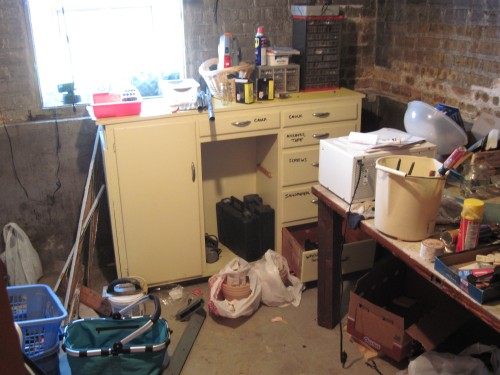
Take a look at where we started. Here’s the basement workshop right next door to the bathroom:

It might not look like the most welcoming space to eventually set up a guest bedroom, but it’s dry and once cleaned up, painted and finished off, we think it’ll be a great haven for our guests.

I started by clearing all the junk from the garage:
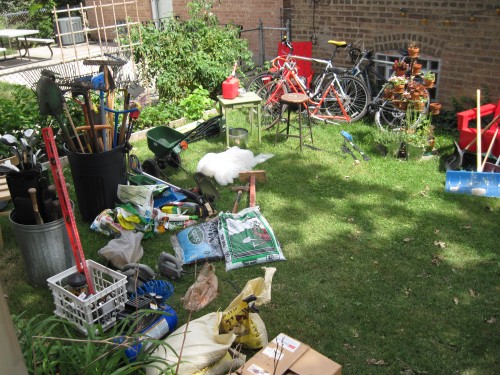
All of that has to go back in PLUS all the tools from the basement. As you can see, we needed a major plan to be able to pack all that plus a car in our 400 square foot garage. So, here’s the space absent all it’s contents:

We swept the floors, scraped out all the (many) cobwebs, and wiped down all the studs. Before anything came back in, we decided it would be important to have a good plan. If we wanted things to have a place and to STAY in that place, we thought it would be smart to assign everything an order before beginning the organizing. So, we used some paper and a tape measure to draw out a basic floorplan of the garage, including all the necessary areas to work around (like windows and doors):

As you can see (maybe), there’s a window on the South and East walls, a door on the East wall, and a big garage door with a small clearance on the sides on the West side. We then took all those measurements, transferred them to graph paper and began a basic layout of the new garage, incorporating all the things we knew needed to go back in:
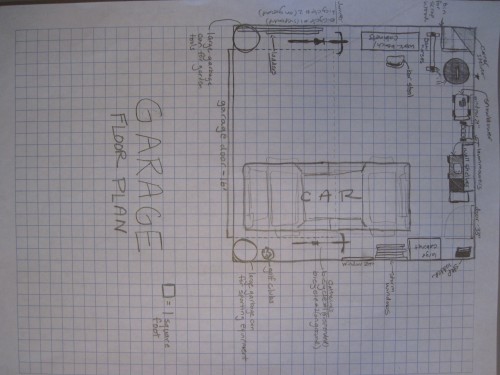
That’s the overview with the car included. It’s probably a little too close to the South wall, but there’s plenty of room in the middle to move it around. Then, we took each of the walls and drew an even more detailed plan on graph paper of each. Take a look at the plans:
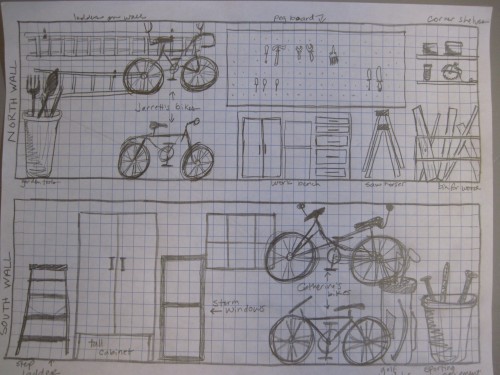
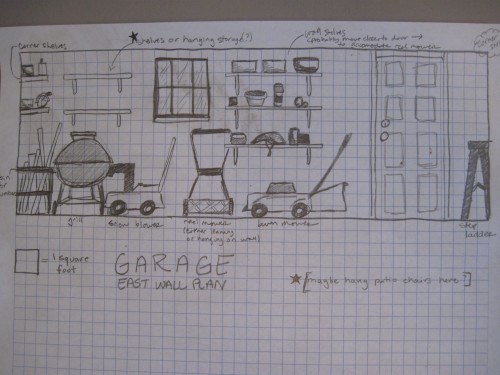
We knew we’d have to incorporate four bicycles, a snow blower, two lawn mowers (the electric one was an unexpected acquisition from a neighbor), lots of gardening and sports equipment, storm windows which we remove in the summers, a charcoal grill, plus lots of tools and lumber. We used the graph paper to assign each element a space, incorporating a big peg board wall to wrangle all the smaller tools.

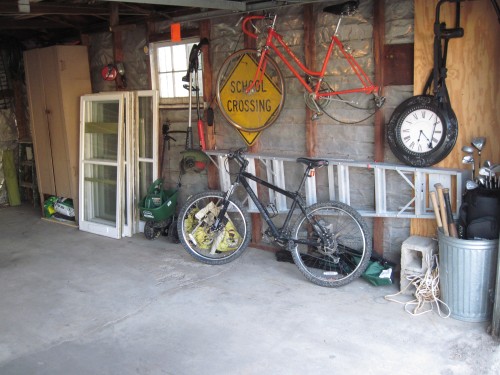
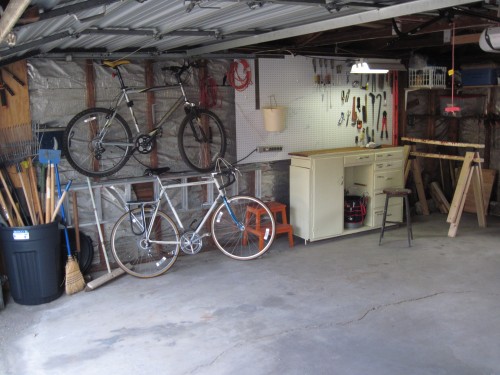
After all the detailed plans were done, and we did quite a bit of work, we came up with this:
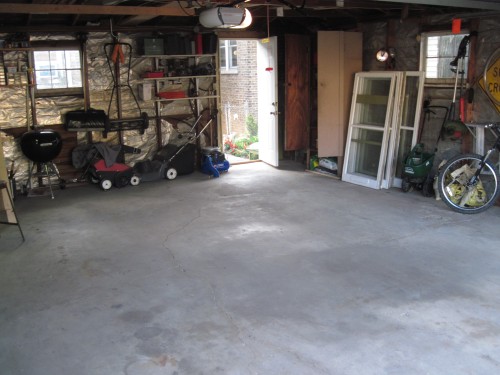
As you can see, the peg board is only half full, which is great, because it allows for us the room to acquire new tools or re-position those we end up going to most often. I moved the workbench from the basement workshop and will hopefully soon cut a new countertop to place on top.

We were able to suspend our least used bikes from the rafters using a pulley system designed to raise and lower the bikes as needed, and place our go-to bikes on the ground, where we can easily access them for a quick trip out. Lots of shelves, too, helped to clean things up and utilize vertical space.
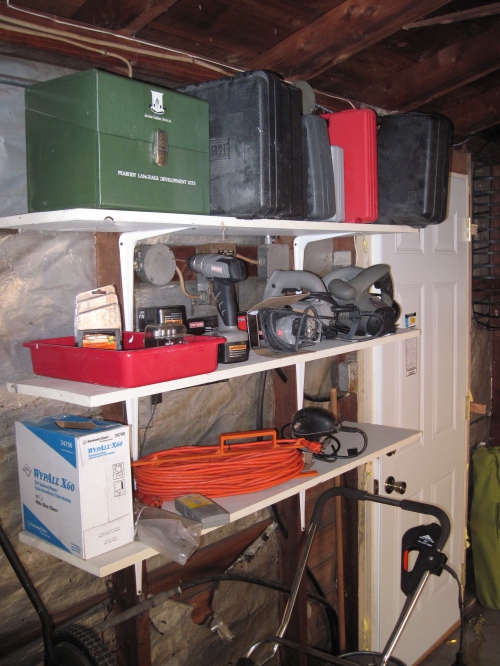
Some things from the plans didn’t translate as well into reality, which was both a good thing at times and a challenging thing at others. For instance, both ladders didn’t fit on the North Wall as I planned, but luckily, there was plenty of room on the opposite wall to fit one after I’d hung the other on the North wall. In some instances, I ended up with more room than I’d planned, like near the sporting equipment. I was able to include the golf clubs in the same bin as the rest of the sporting goods and free up a little floor space there.
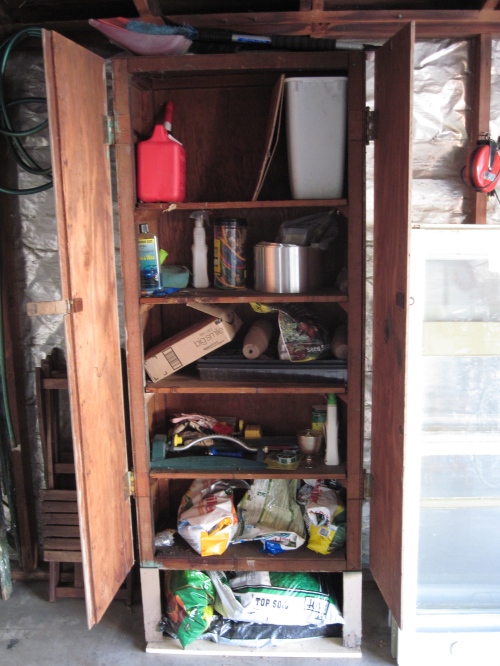
Even the large cabinet got a little organization, and it know houses both garden tools, auto needs, and some gutter/exterior essentials.

We were also able to use the rafter space to store most of the scrap and unused lumber we had laying around:
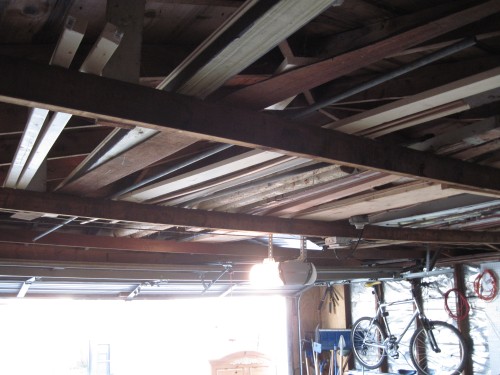
Hopefully this newly organized garage can stay that way and make way for a new guest quarters in the basement.

3 Comments

Filed under Uncategorized